Showing posts with label Oil Painting. Show all posts

Rhino. Underpainting. Brushes. Etc.

I have a ton of brushes.  Most of them are cheap, a few set me back $20-$30.  I love having a variety to choose from for each stage of a painting. 

Untitled

I've been keeping momentum going in the studio.  I just started this little rhinoceros a few nights ago.  I'll start a larger painting within the next few nights too, but I like having these mid-sized paintings to work on in between the larger works.  The figurine for this piece is so small and hard to see for painting the details.  It will be a challenge for sure.

Untitled

I also picked up this little guy last week.  I have been avoiding the thrift shops for the most part since we moved because we are really trying to get rid of a bunch of stuff, but every once and a while I'll sneak out to look for something really specific.

Untitled

Well, I'm off to work in the studio!  And again - if any of you are in Minneapolis this weekend (Nov 7th) please stop by the opening of my exhibition at Soo Visual Arts Center and say hi!  I'd love to see you! PS - they are also unveiling a couple of new limited edition prints for purchase there - so be the first to see which ones will be released!


In the Studio

While getting the house into a functional state, I've also been plugging away in the studio.

I finished all of the work for my next show before we'd moved.  When you paint with oil paints, you've got to really push your deadlines for exhibitions back because the works need time to dry and in my case be varnished with an initial varnish so the surface appears nice and uniform.

Putting the last layer on this guy today. Almost done.

I'd started this little cardinal before we'd moved, and just had to put one more thin layer of paint over the whole thing to really solidify the colors.  The red I used for this painting was cadmium red which is very slow drying.  I had to transport this guy half-dry from SD to WI, and I'm glad he survived the transit without getting distorted!

Untitled

Last week I sent out the pieces for my next exhibition titled Conscious Objects which opens the 7th of November in Minneapolis, MN at the Soo Visual Arts Center.  It is always a big job to pack and ship work, as you have to be prepared for it to be dropped off the side of a truck or stepped on - hah. Here's a sneak peak of this happy squirrel before he was cased in many layers of plastic, foam, and cardboard.  If you are in Minneapolis, please check out the work - it will be up for the next month + - here is the press release: Conscious Objects at Soo VAC

Untitled

Otherwise, I've been able to put in some good hours in the studio - both painting, and organizing/photographing/doing paperwork. I'm starting to get back into the groove, and kick out some work.

Untitled

This one has been especially fun with the complexity of the hair to go along with the reflective surface.  Plus, how can you resist this guy's face?

Untitled

I've also been really trying to refine how I prepare my surfaces - especially for my works on panel.  I'd been gessoing them with a roller and light sanding between layers, but I wasn't really 100% happy with the slight surface texture.  It worked great for blending paint, but it was driving me nuts when it came to fine details.  So I switched up my method of application and my sanding process, and made a batch of ultra smooth panels for some of my next paintings.

Untitled 

These are underpaintings on those panels - a continuation of the series 'faux landscapes' that I've been working on the last few years.  I'm pushing these to be a little bit more abstract than the some of the others I've done in the past.  I'm not sure if that is the direction I'll keep pushing them, but in the meantime I'm having fun.

Untitled

I'm loving the surfaces so far though - they are divinely smooth, and the paint is gliding like a dream.  It is nice when you get to the point where you don't have to fight the materials to get them to do what you want.

Remember Me?

Hi -

What is happening to me - first a pink phone now a pink sweater.  I am finally becoming a real girl.

It's been a long time!  I've been doing things I swear, but blogging has been on the back burner this last semester as teaching two new studio classes last semester managed to eat up a good deal of my free time.

So here's my attempt at an update!  :)

Had fun building color schemes with my students in class today.

First, there's the teaching - Last semester I taught Figure Drawing, 2D Design, and Art History I.  This semester I'm teaching two sections of Design II - Color, and Art History II.  I've been re-vamping the courses quite a bit to really fit the mission of our department which educates students in Digital Arts and Design Fields (graphic design/ audio production/ animation/ digital storytelling/web design).

Making a few demo pieces for next semester's classes today.  #art #lino #printmaking

Those of you who work in education know that re-designing courses can be a huge time commitment - but it is really important for me to make sure my students don't see their foundations courses as something they can breeze through, or don't need.  I try to teach them the essentials of design while also pushing them to start finding their creative voice and develop conceptual skills early on.  

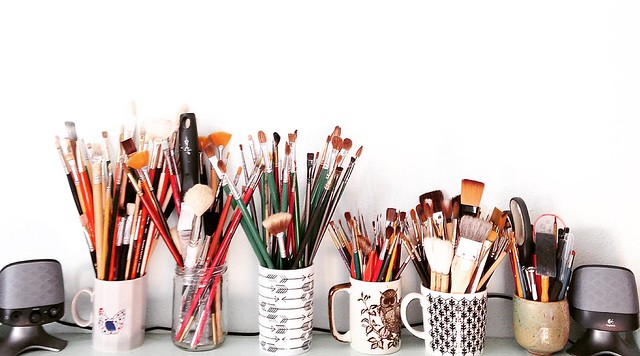
I've been spending a good chunk of time over 'break' developing new projects, learning new skills, and putting together example/sample images.  I'm really hoping it will pay off this semester. :)

Afterlight

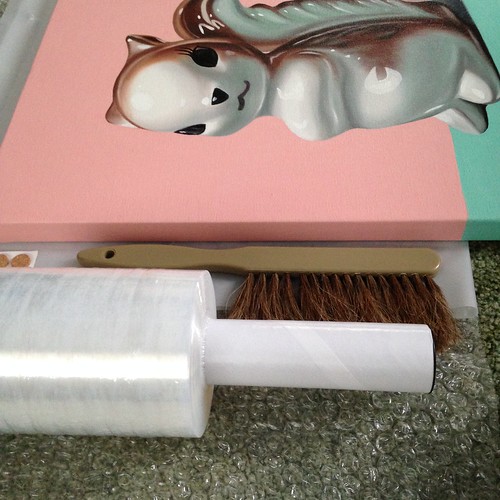
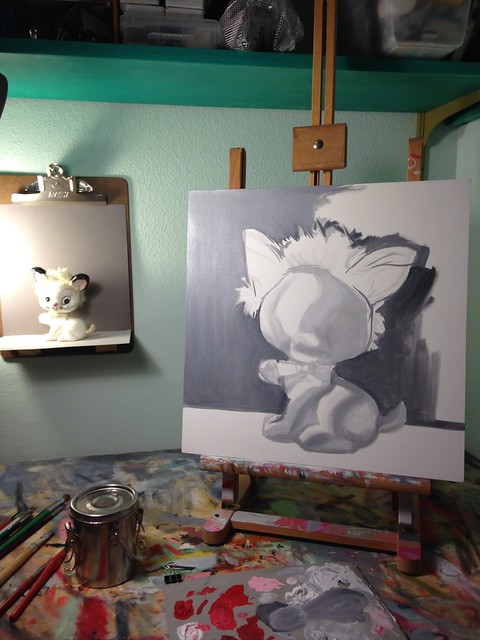
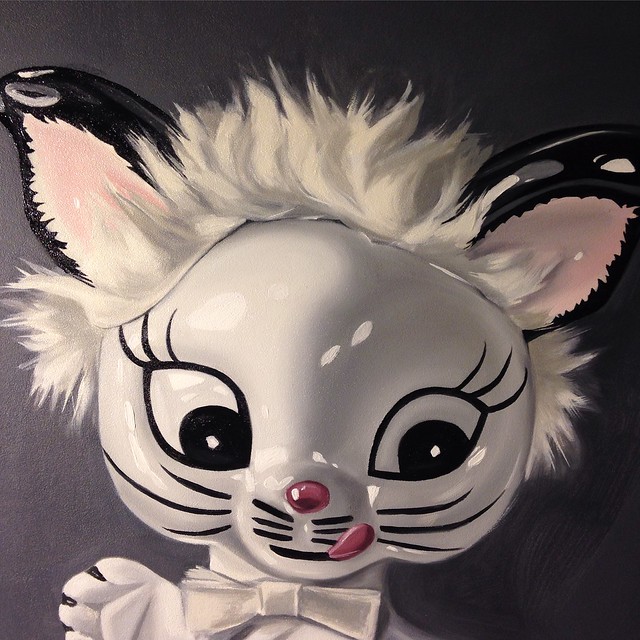
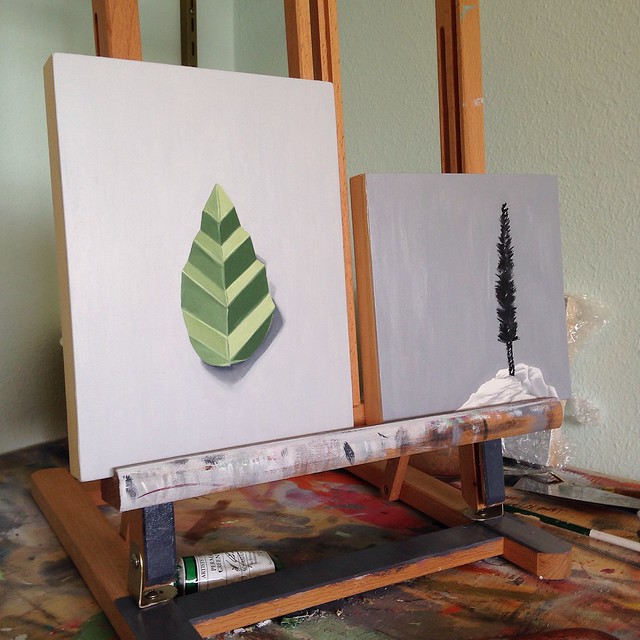
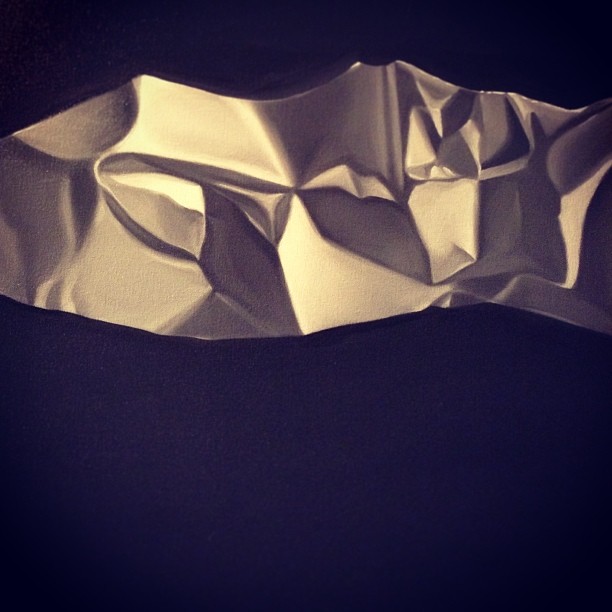
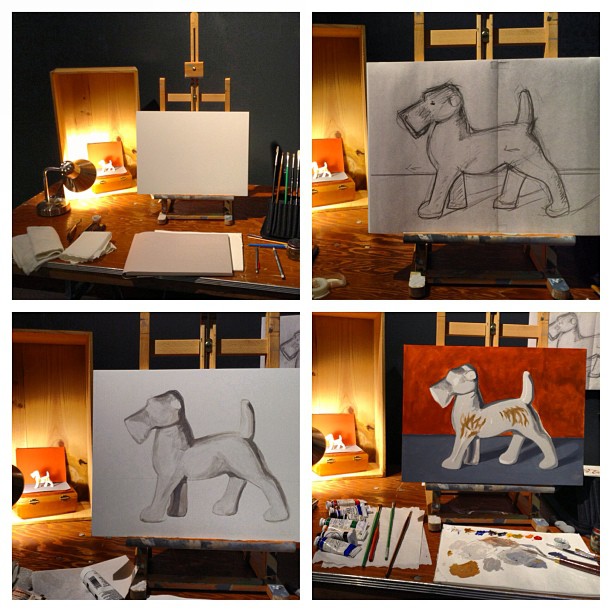
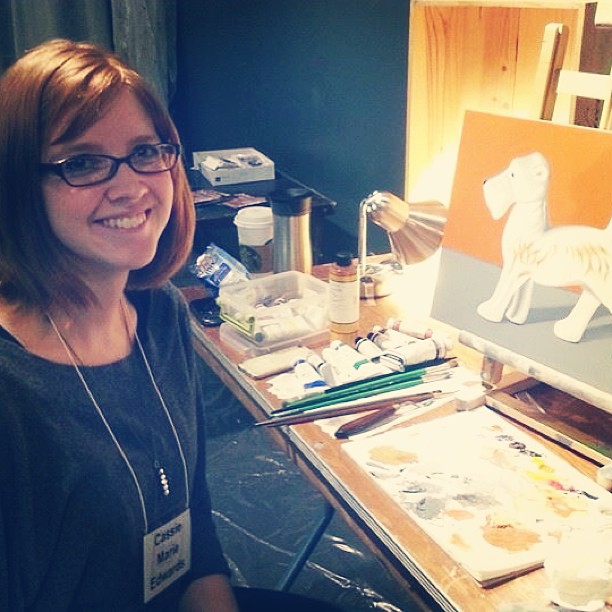
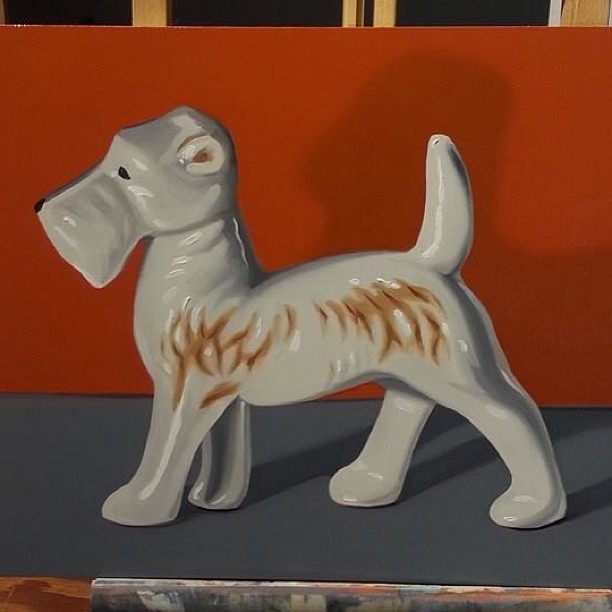
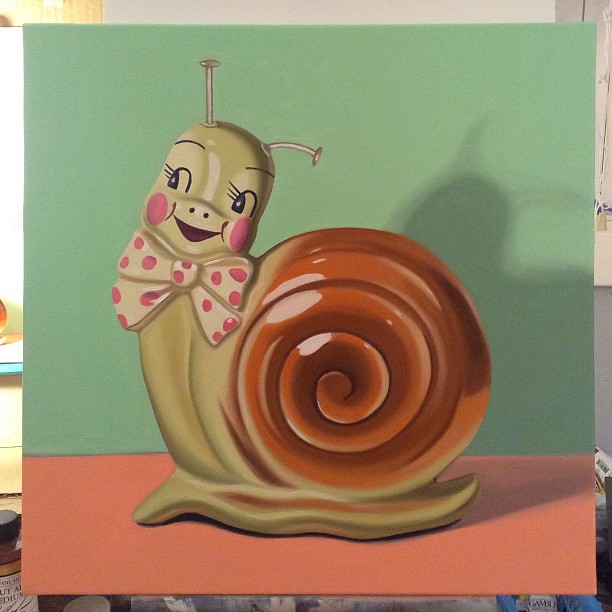
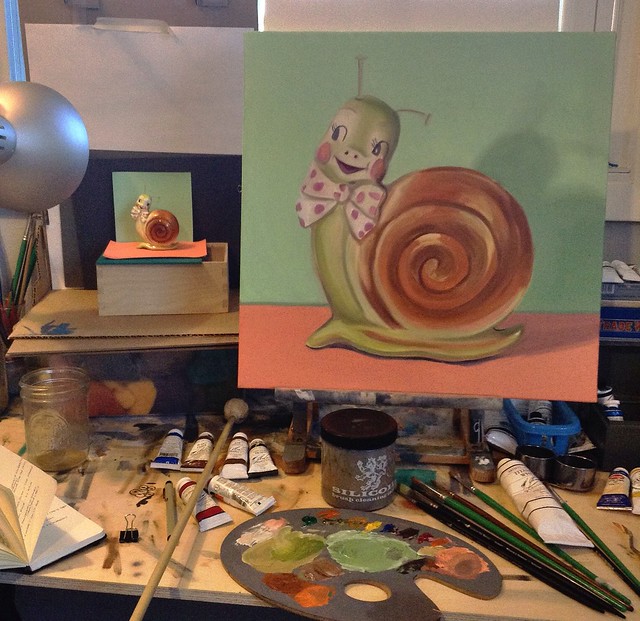
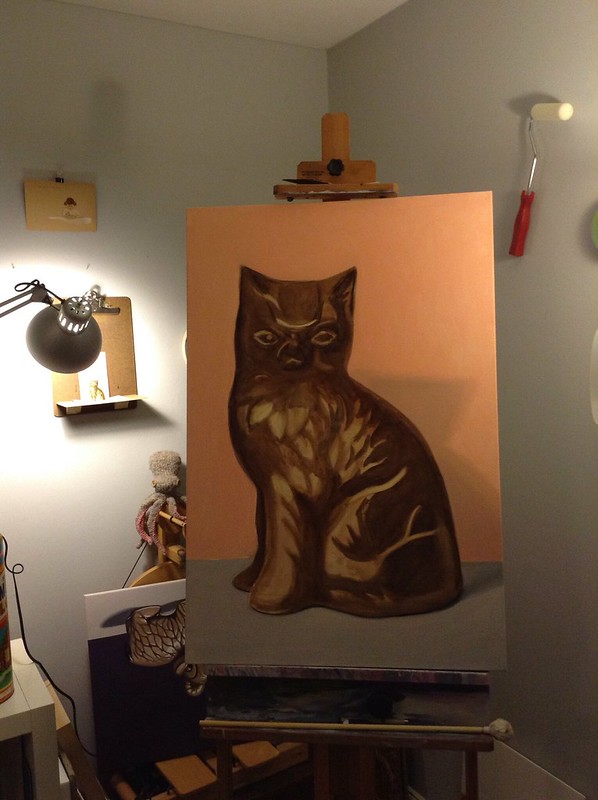
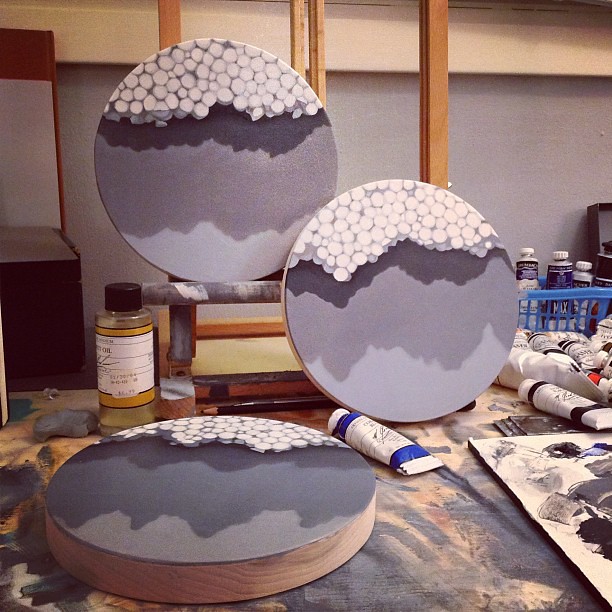
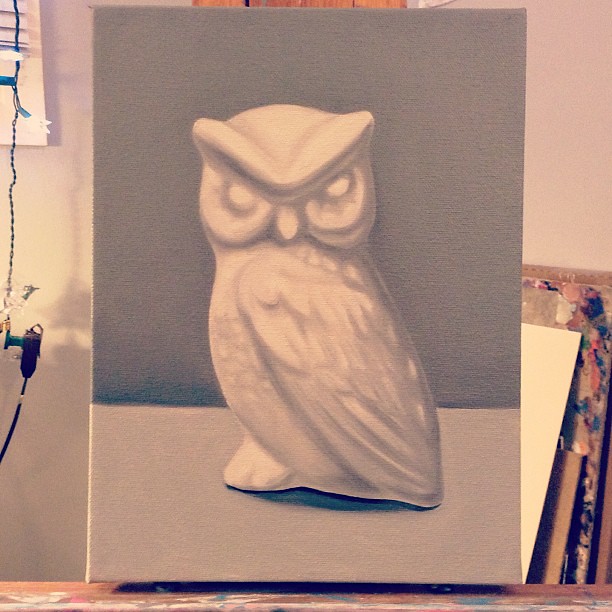
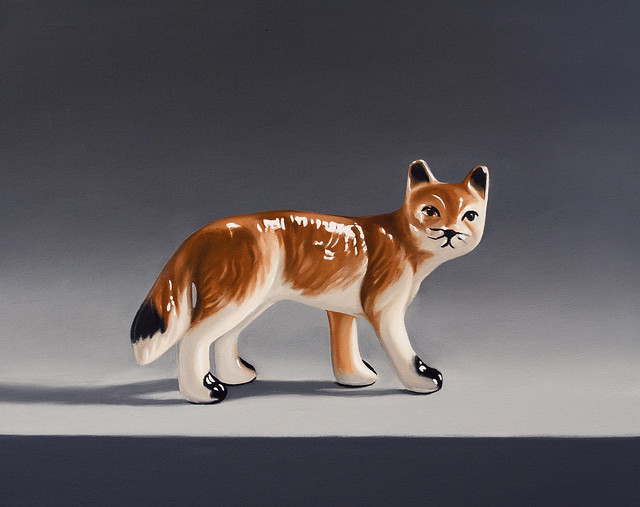
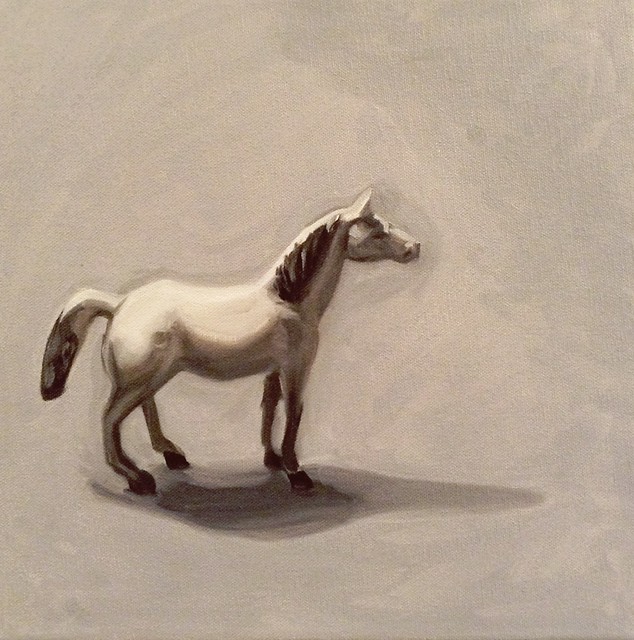
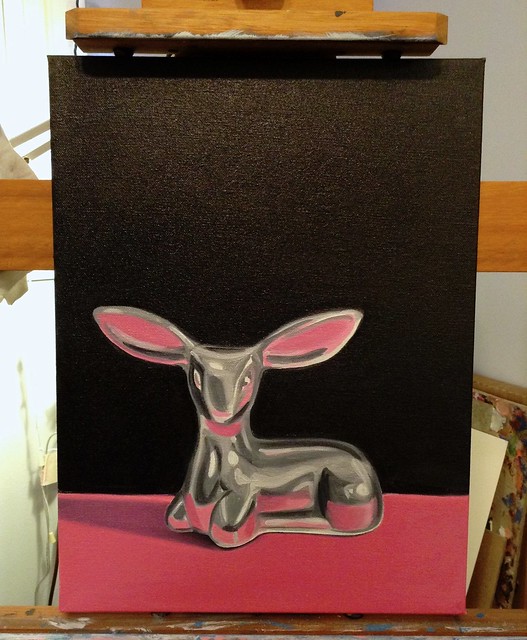
I've also been plugging along in the studio.  Last semester it was a challenge to make the time to get work done - and in addition, I was working on this GIANT PAINTING OF DOOM that was really testing my control issues with paint.

Sooo ready to be done with this painting.
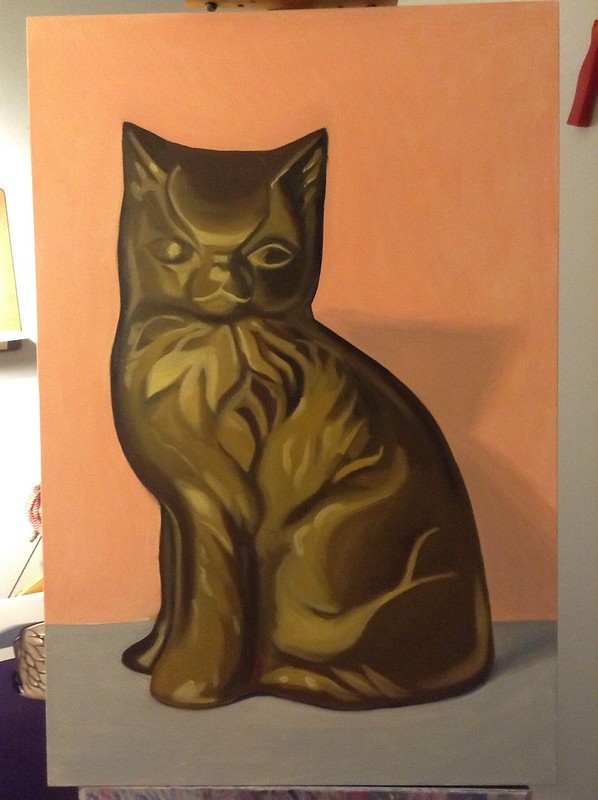
(detail from the painting of doom)

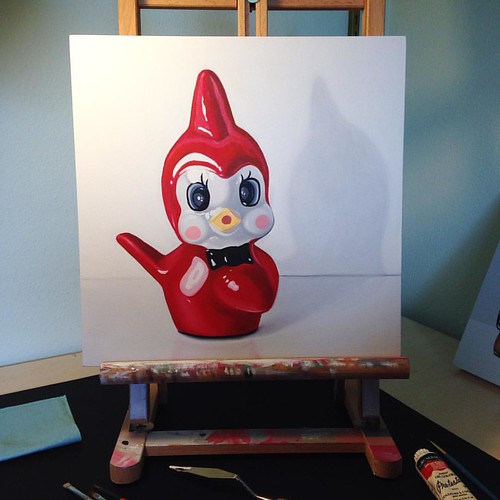
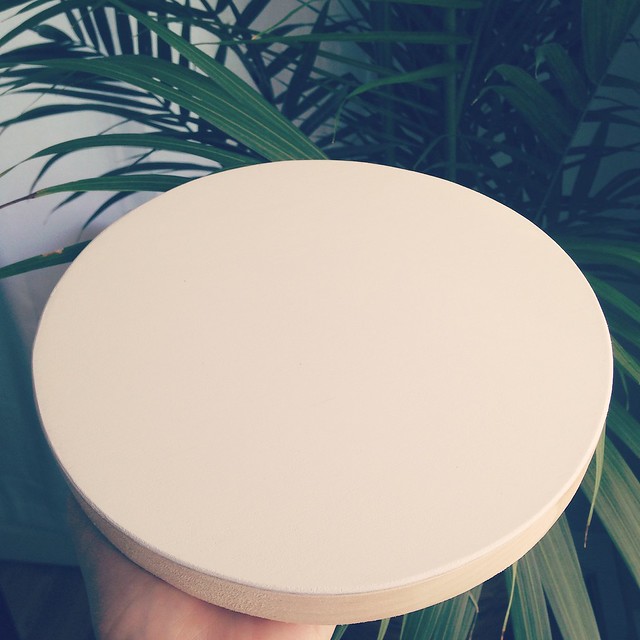
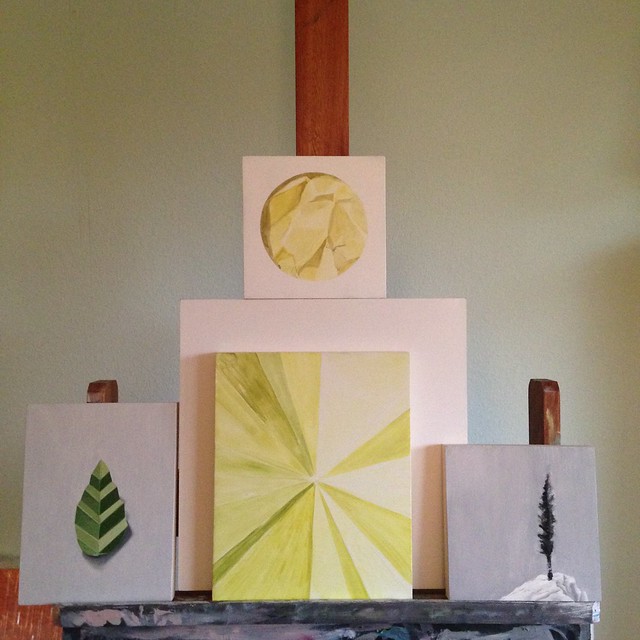
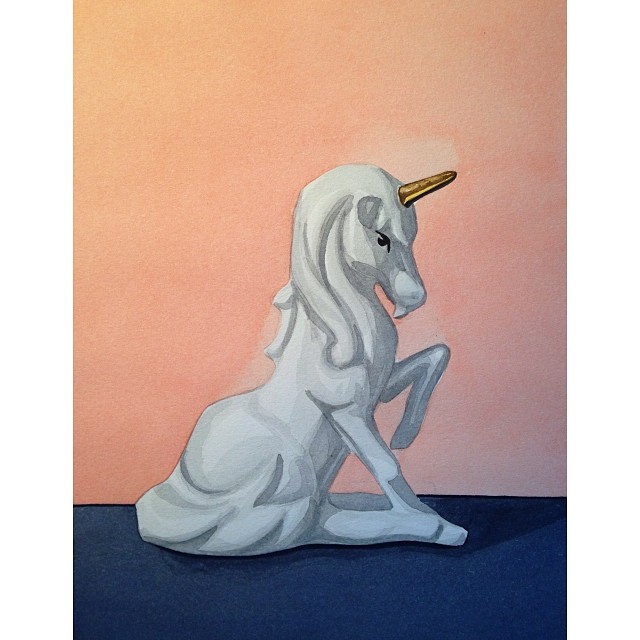
I wasn't letting myself work on other paintings until it is finished, and as a result, ended up avoiding my studio for a month.  I'm still working on it, but I'm letting myself off the hook a little bit and working on some small fun watercolor paintings in the meantime.  I've got five oil paintings that are halfway finished - those are my priority once I get a little further into the semester.

Workin'

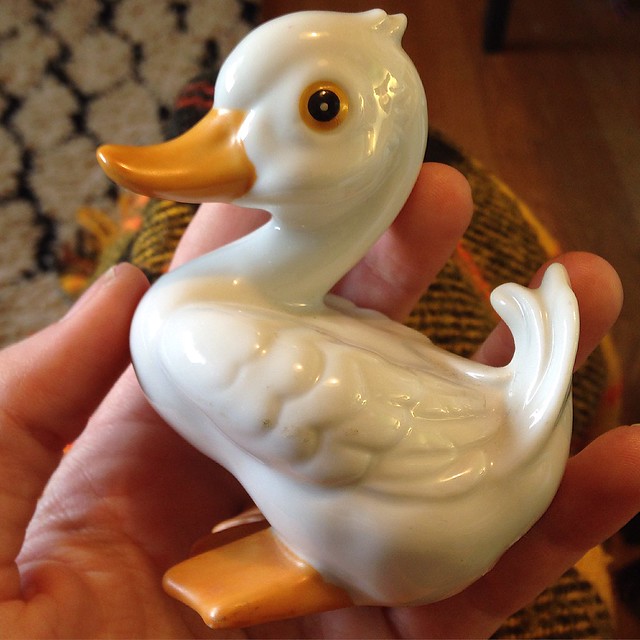
My hope with these watercolors is to re-populate my Etsy shop (which has been neglected for a while now...) and to get some lower price-point pieces out in the world for those who would want to purchase a piece directly from my studio.  :)

Other than art-teaching and art-making we've been hunkering down at home quite a bit - it's been an especially cold winter thus far, and we've been taking full advantage of staying cozy.

Homemade ravioli tonight!  :)

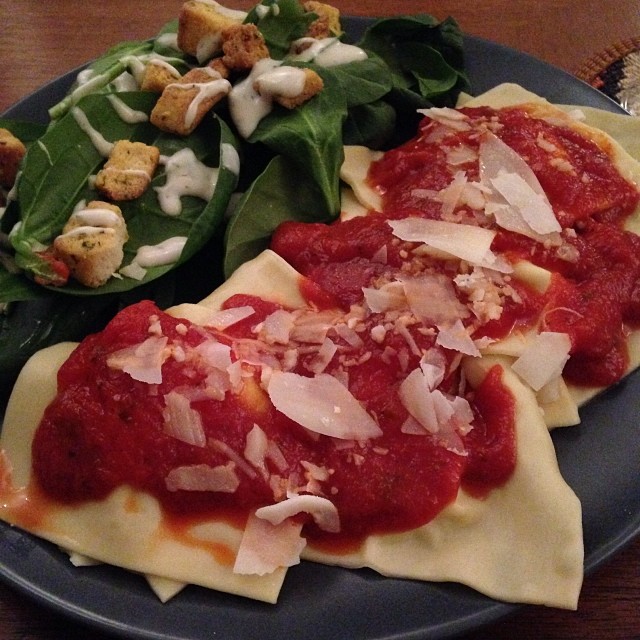
Part of that plan is making as many batches of homemade ravioli as possible. :)

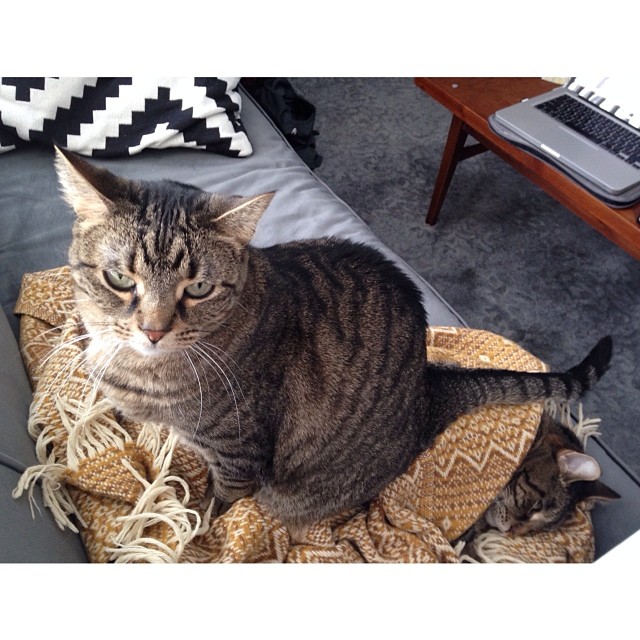
Rascal thinks part of this plan is sitting on her brother for warmth:
I was cuddling with Bo and Rascal got jealous so she sat on him. Haha.
Hope you are all having a great new year!

Studio 301 - Washington Pavilion

My progress throughout the day. :)
I participated in this year's annual Washington Pavilion one-day-art-making-extravaganza last weekend alongside 40 or so other artists from the region, and had a blast despite the massive head cold that was trying to kill my spirits.

Studio 301

I really love participating in this event because it gives me a chance to meet a whole bunch of new people who are passionate about art.  We also get a chance to talk to a lot of kids who are all wonderfully curious (and blunt - which is hilarious especially in the beginning stages of my pieces where the painting hasn't really taken shape yet) about art.
My piece from Studio 301 yesterday. :)

Although it was a small piece, I still used the full 10+ hours that we were there that day to really buckle down and finish my painting.  It is always a challenge to push through and get the pieces finished.  I really loved seeing everyone else's pieces too!  

Snail Painting Timelapse

I put together another quick timelapse of a painting that I'm currently working on.  It shows the initial layer of paint (the under-painting) being applied to the canvas.  This covers about 2-3 hours of work, and is done from observation.


I'm in the middle of the third layer now, and you can see the progress:

Coming along slowly but surely.  Just like a snail... :D

Now I've just got to 'tighten' everything up and add some of the small details.

Getting my work packed and ready to install at the Brookings community cultural center.  The glamorous life if a artist.

I also packed up and delivered 30+ paintings to Brookings for my next show which starts next week and runs through the 19th of July.

Big thanks to the lovely assistants at the BAC who helped install the show!
My wonderful assistants for the day!

New additions.
I also may have picked up a few new 'subjects' at the thrift shop on my way home.

Hope you are all having a lovely and productive summer. :)

In the Studio

Untitled

I finally finished these three paintings - they are 8" round, and are oil on panel.  I haven't decided on titles yet.  They are a continuation of the small faux-landscapes I've been working on.  These happened entirely by mistake.  I had intended to paint a different triptych on these panels, but I was cleaning my studio and leaned a sheet of broken packing foam against the grey wall in my studio, and it caught my eye enough to inspire these paintings.  Inspiration comes from the strangest places sometimes.

I've also been working on a few more figurine paintings this last week - I'm attempting to finish these in the next few days so they are dry for my show in June-July at the Community Cultural Center in Brookings, SD.

Untitled

This little snail was given to me after I did a talk in my colleague - John Nelson's - class about social media.  I'm glad my co-workers understand my love for kitsch.

I'm also working on this amazing brass cat:

Untitled

This is the first layer of paint.

And here's the second:

Untitled


In other new and exciting news, I downloaded an app called lapse-it to do time-lapses with my ipod touch!  Here's my first go - it is a painting session of about an hour and a half - I'm working on laying down the second layer of this painting:


Neat eh?  I've already done another one - but the light shifted mid-way through so I've got to edit it a bit to get it to look better before I post it.  

I also put together this handy little clipboard/ still life setup to clear up a bit of table space in my studio.

Untitled

I basically just glued scrap wood to a clipboard and reinforced it with 1" screws after the glue dried.  It is nice because I can just hold it to the wall with a push-pin, and it makes it easier to stand while working from my little still life paintings.  I can also get a lot closer to them which is very helpful when I'm painting a 3 foot tall painting of a 3 inch tall figurine.  :)

Everything all at Once - Progress in the Studio

Workin' - late night painting session.

I've been chugging along in the studio these last few weeks - slowly chipping away five paintings all at once.  Oil paint dries fairly slowly, so I like to have a lot of things going on at once.  The only downside to this method is that sometimes it feels like I go a long stretch without finishing anything.

Seduction. :)

I'm almost finished with both of these paintings at this point - I've just got to tighten them up a bit.  Another 4-5 hours on both of these and the'll be done. :)

I'm also making good progress on these tondos - they are a lot of fun.  I've got to add another layer of grey to the background to flatten out the color and get them super-smooth.  

Working on these fine fellas tonight.  Time for a g&t break.

Alongside the paintings, I've also been assembling some stretcher bars.  I tend to be a bit of a perfectionist when it comes to materials and surfaces, so they usually take me a while to build.  I route the face of the lumber to create a raised edge for the canvas, and then chamfer the edges so there's a smooth transition for the canvas.  I think if I wasn't a painter, I'd probably be a woodworker.  

Thinking big (but not too big that they won't fit on my car...)

I'm hoping to do some large pieces - I've been waiting patiently for winter to end so that I can get back to building frames in the garage.  Unfortunately, we're going to be getting snow (argh!!) this week, so for now the cross braces on these pieces will have to wait.

Let's hope it warms up soon - but in the meantime - here's some shots of the South Dakota countryside:

upload

upload

Hope you all have an excellent week.
-Cassie 

Paintings in Progress - Instagrams from my Studio

I've been hard at work in the studio the last few weeks getting some new pieces done for my next show at Deer Run Art & Artifacts in Cambria, CA.  I can't wait to get these finished and sent out!

Workin'

This is the underpainting for this piece - I've still got another two layers or so to build up the surface and really make it 'shine'.

I'm going to spend my afternoon with these guys.
I also recently bought more brushes - I'd had one of these cheapo sable brushes from Blick that I'd used for about 8 years now (and pretty much reduced to a nub...) and it was my favorite - so I finally remembered to order more.  I'm in heaven - these are the cheapest most amazing brushes.  They are great for blending glazes and thinned background layers.  These aren't all of them. I seriously ordered about 20 of them - good thing they are cheap.

Sometimes paintings are too small for an easel. :)

I also started this little guy, and am pretty smitten with him.


The view from here.


I'm about halfway through - he needs another layer of paint to build up the surface as well.  I'll have a hard time parting with this guy. :)

PS - I'm on Instagram!  Check it out: Cassie Marie Edwards

New Work - Cassie Marie Edwards

Hi guys, just thought I'd post a few of my recently finished pieces to the blog! I've been busy photographing/documenting/and organizing my work these last few days, and realized I hadn't shared these pieces with you all yet.

20 - Faux Fox - 16x20 - 2012 - Cassie Marie Edwards

{Faux Fox - 16x20" - Cassie Marie Edwards)


07 - Horse - 12x12 - 2012 - Cassie Marie Edwards

{Horse - 12x12" - Cassie Marie Edwards}


17 - Panther - 12x16 - 2012 - Cassie Marie Edwards


{ Panther - 12x16" - Cassie Marie Edwards }


Check out more pieces at my website here:

In the Studio - Plastic Horse Painting

Started this painting yesterday - it is 12x12" and oil on canvas.  I love doing these smaller paintings.

Here's the base of the underpainting - in this layer I'm laying out the light and dark areas of the composition.  I also noticed after doing this layer that the neck was weird, so I had to go back in and change it.

Painting


As usual, Rascal had to join me - she is only allowed in the studio if she sits in her little 'bed'.

Painting

This is how far along I got last night - just working wet-in-wet.  I'll let this layer dry for a few days and then add another layer over the top to really solidify everything and get a good amount of detail in to the horse figurine.

Painting

Studio: How to Paint an Underpainting in Oil

Yesterday I took some time out between teaching to start a new piece. I've got two solo exhibits coming up in the next month and a half, and so I'll be putting in some good studio hours in the next month. I thought I'd take this opportunity to walk you through my painting process a bit.

  Untitled
First, I set up a still life and light it. This can take a while - even with a fairly simple backdrop. Finding the right colors and composition can be really difficult! After I set up and light my still life, I sketch out a few options for the composition. For this image I am using a 12x16" canvas so I made my drawing 4x5.3" (1/3 scale). I do this quick drawing to make sure the image is balanced, and then use it as a guide for my next step.

Untitled

Next, I draw out the figurine from observation. This can also be a deceivingly time-consuming step! Most of the time it takes an hour or so to get things just right. I'll use visual observation, measuring, angling, and observing negative space to get the figurines sketched out properly. I use a hard-leaded pencil (3H or 4H) and erase more than I draw! In the end I look to have an outline of the main forms, and a light sketch of some of the details.

Untitled

After the sketch is finished I start the under-painted layer. This layer is the foundation of the painting - an oil 'sketch' that starts to build the opacity of subsequent layers. For this layer I use oil paint thinned with low odor mineral spirits (with good ventilation of course!). This follows the #1 rule of oil painting - to paint 'fat over lean'. Lean paint is paint thinned with a thinner, and fat paint is paint in it's thick, straight from the tube consistency, or paint with added oil (such as linseed) for glazing or added work-ability. To start the figurine I painted a thinned layer of grey paint - this effectively 'wets' the area, making it easier to smoothly brush additional layers over the base color. This keeps the edges of brushstrokes nice and smooth.


Untitled

Next, I start blocking in the light and dark areas within the figurine, and adding some color as well. I work from simple to complex. I think a lot of painters get caught in the 'trap' of trying to make everything look perfect right away - or starting detailed painting in one small area only to figure out that their composition is no good by the time they are almost finished. Blocking things in can give you a great idea as to whether or not your painting stinks in a fairly quick time period. I've had quite a few paintings that have been 'wiped' at this point (wiping= taking mineral spirits and essentially erasing the entire thing off of the canvas and restarting
at square one!).


Untitled

At this point, I start to get more in to the details - blending the transitions between light and dark, painting in some of the highlights and shadows in more contrast, and filling in the first layer of the background. Again, I keep these layers thin - using only paint and paint thinner. My goal with this series is to have a relatively flat finished surface, so my approach is to layer 2-3 layers of thinned paint over one-another to minimize the appearance of brush strokes on the canvas. This is my 'finished' under-painting. I'll let this guy dry for a week or so, and then get working on the next layer of the painting where I start to really refine the forms and make it 'shine'!


Lastly, I'm pretty sure the color scheme of this painting was unknowingly influenced by my sock choice that day.
 Untitled

I guess that's a sign that I am easily influenced - hah! Thanks for reading!