
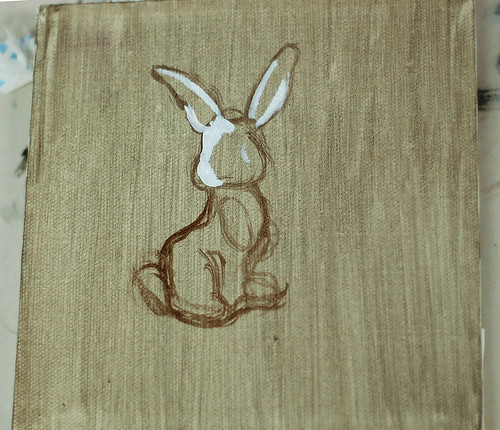
As I recuperate from the craziness of last semester, I've been doing these little paintings as a way of keeping up my oil painting techniques. I thought I'd share the process of this little painting that I spent two seperate sessions making. This is how I usually start. I like to have a thin layer of color (usually greenish/brown) down as a base, sketch out my composition in thinned paint, and then I start to build up the highlight areas in big chunks. This helps me lay out the composition and value areas really quickly.

I love working from life. As someone who has worked from photos through much of undergrad, working from life for the last few years has really helped me improve my skills. As you can see, my setup is pretty basic, but for these little studies I just wanted something simple and straightforward to work from.

Once I get the light areas in, I start with the shadow areas as well. Usually I am using straight up oil paint with a little thinner mixed in for this base layer. You don't want to add too much walnut or linseed oil into your paint with the base layer or you risk your next layers cracking over time because of uneven drying rates. Also, I usually do the detail areas first, and then fill in the background, this is just personal preference as sometimes I accidentally smear my hand across the background if I add it in too soon.

And then it is just a matter of refining and moving paint around.
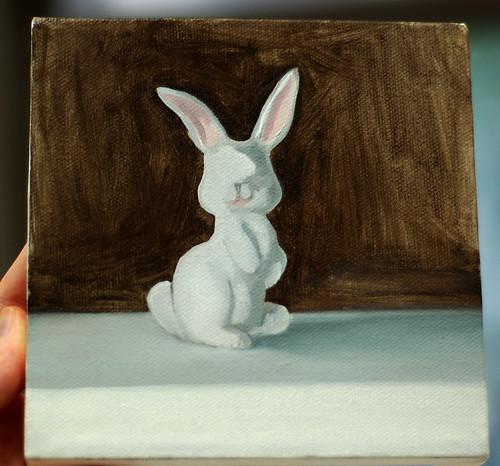
At this point I let the painting dry for a few days. This will allow me to really get into the detail areas later, and smooth out some of the brushstrokes. A lot of times, I like the way the brushstrokes look, and don't go to great lengths to smooth them out. But since this bunny is ceramic, I felt like it didn't really hold up visually unless I took it to a glossy smooth level of finish.
So, in the second second session I went in and solidified the background and the foreground with another layer of paint, and then went back in to the bunny with tiny little brushes to smooth out the brushstrokes and really blend the light and shadow areas together smoothly. The pure white highlights and the black nose and eyes were the last step of this painting.
And then it was finished:
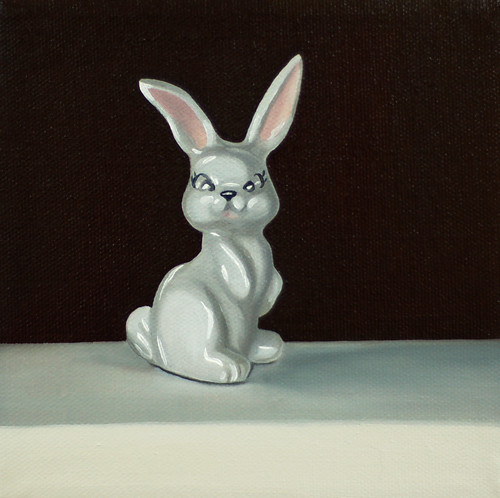
Ceramic Bunny Study #2 - Oil on Canvas - 6x6"
oh it's so cute! never knew so much logistics were involved in oil painting. I think I'll stick to my charcoal.
ReplyDeleteThanks for posting this Cassie! I love seeing the process. :)
ReplyDelete